Sudowrite’s Story Bible: How to Write a Novel in 7 Clicks (with AI Help)
“Turn a spark of an idea into a full novel foundation—fast. In this video, we walk through Sudowrite’s Story Bible step-by-step: from your first Braindump to a”
Sudowrite Story Bible: The Fastest Way to Turn “A Vibe” Into a Real Novel Plan
Most people don’t get stuck because they can’t write. They get stuck because their story lives in a messy cloud of half-decisions: a cool character, a handful of scenes, maybe a killer ending… but no solid “source of truth” to hold it all together.
That’s what Story Bible is for. It’s the structured place where you dump what you know, generate what you don’t, and keep your project from turning into a pile of conflicting notes. And yes—when it’s filled in, it also makes the AI behave better because it has clearer context.
If you’re using Sudowrite, Story Bible is basically the on-ramp from “seed of an idea” to “I can actually draft this.”
What Story Bible actually is
Story Bible is a set of sections you can fill out in order (like a guided process) or jump around in as inspiration hits. Either way, it becomes your internal reference doc—your canon—so you’re not constantly re-deciding things.
Two common ways people use it:
- Generative mode: start with a rough idea, let Story Bible help create structure.
- Organization mode: you already have a draft and want a clean place to store story facts.
And if you’ve got a work in progress outside the tool, you can import it so Story Bible can populate itself. That’s especially handy if you’re trying to write a sequel and want the “world rules” and character details captured quickly.
Step 1: Braindump (get it out of your head)
The Braindump is where you jot down what you know so far—up to 2,000 words. This is not the place to be precious. Think of it like dumping puzzle pieces on the table.
Good stuff to include:
- your premise in plain language
- the main conflict (even if it’s fuzzy)
- the vibe you want (cozy, bleak, funny, tense)
- any scenes you know you want
- the ending you’re leaning toward (even if you’re not sure)
The goal is simple: prime the system with your vision.
Step 2: Genre (don’t just label it, unpack it)
Genre is limited to about 40 words, and the best use of that space isn’t “romance” or “thriller.” It’s the underlying ingredients.
Instead of labels, write the elements:
- themes you’re exploring
- emotional tone
- pacing expectations
- what kind of experience you want the reader to have
That gives the AI better guidance later, because it’s working from intent—not a vague shelf category.
Step 3: Style (how you want the prose to feel)
Genre is the vibe. Style is the construction.
This is where you say things like:
- short, punchy sentences vs long, flowing ones
- lots of dialogue vs minimal dialogue
- lyrical descriptions vs tight, clean language
- first person or third (if you’ve decided)
You can also speed things up by choosing a featured style, or using “Match My Style” so the tool analyzes your own writing and builds a style guide from it. That’s huge if you want consistency without manually describing your voice.
Step 4: Generate a synopsis (the moment it becomes a “story”)
Once Braindump + Genre + Style are in place, you can generate a synopsis. This is where things snap into shape: beginning, middle, end—plus gap-filling.
Here’s the important part: treat the synopsis like a draft, not gospel.
If it’s close but not quite right, you can:
- tell it exactly what to rewrite (“make the third act a cliffhanger”)
- or do a heavy human edit yourself
The synopsis you keep should reflect your story, not the tool’s best guess.
Step 5: Characters (cards you can actually work with)
Next, you generate character cards. The tool will create detailed cards for named characters—and it may invent “missing roles” (like an antagonist) if the story feels like it needs one.
You’re not stuck with any of it. You can:
- delete characters that don’t fit
- rename the ones that feel generic
- edit traits and add custom traits
Custom traits are where this gets useful. Example: in a mystery, you might add a private “motive” trait for the murderer so you don’t lose track of it.
Step 6: Worldbuilding (everything that isn’t a person)
Worldbuilding is like character cards, but for the rest of the story’s reality:
- settings
- key events
- organizations
- political systems
- important items
You can generate elements one at a time, or do a smart batch workflow:
- use your synopsis to produce a list of worldbuilding elements
- paste that list in and import multiple items at once
This is how you keep continuity without constantly rereading your own draft.
Step 7: Outline (the slowest step, but the big payoff)
Finally, you generate an outline. This takes the longest, but it’s where Story Bible turns into a chapter-by-chapter plan you can draft from.
You can use:
- the default novel outline format
- alternative structures
- or a custom outline if you prefer your own framework
Once you have chapter summaries, drafting becomes a lot less intimidating because you’re not inventing the story while writing the prose.
The point of Story Bible
Story Bible is basically the fastest path from “idea” to “foundation.” Not perfect. Not magical. Just a practical way to get your story out of your brain and into a shape you can work with—without losing the thread halfway through.
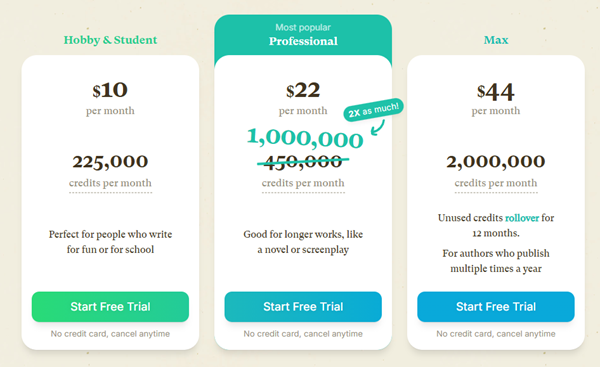
It costs nothing to try out Sudowrite, you don’t even need a credit card to signup!