Hostinger Tutorial 2026: From Purchase to Publish (Step-by-Step Walkthrough)
Buying hosting is the easy part.
Knowing what to do next is where most people hesitate.
This guide walks through what actually happens after you purchase Hostinger — in the order you’ll experience it — so you can move from payment to a live website without second guessing each step.
Step 1: Choosing the Right Plan (Before You Click Pay)
Before anything else, you’ll need to select a hosting plan.
For most beginners, shared hosting is more than enough. Within that category, the Premium plan typically covers:
- Website builder access
- Business email
- AI tools (limited set)
- Unlimited bandwidth
- Free domain (first year)
If you plan to run an online store or want full AI functionality, the Business plan includes:
- E-commerce features
- Expanded AI tools
- More storage
- Higher performance allocation
If you’re unsure, start smaller. You can upgrade later without rebuilding your site.
Step 2: Registering Your Domain (Don’t Rush This)
After payment, Hostinger prompts you to claim your domain.
You’ll get a free domain for the first year on most plans. This is where many people move too quickly.
Things to consider:
- Short and easy to spell
- Brandable
- Avoid hyphens if possible
- .com is usually preferred
- Consider location-specific extensions if relevant
Once selected, you must verify your domain ownership via email.
Important:
If you don’t verify within the required timeframe (usually 15 days), your domain may be temporarily suspended. Always confirm this immediately.
Step 3: Accessing hPanel (Your Control Center)
After domain setup, you’ll land inside Hostinger’s custom dashboard — hPanel.
Unlike traditional cPanel systems, this interface is simplified and more visual. You’ll manage:
- Domains
- Websites
- Databases
- Backups
- Emails
- File manager
- SSL certificates
If you’re new to hosting, this layout is easier to navigate than older hosting dashboards.
Step 4: Deciding How You Want to Build
Now comes the real fork in the road.
You have two primary options:
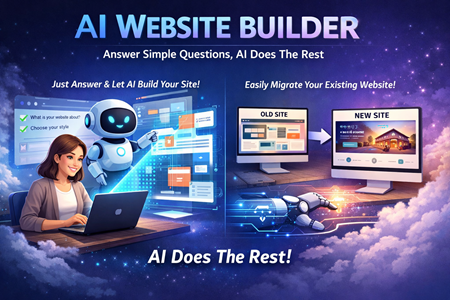
Option A: Hostinger Website Builder
Best for:
- Beginners
- Small business sites
- Portfolios
- Simple stores
- People who want speed over complexity
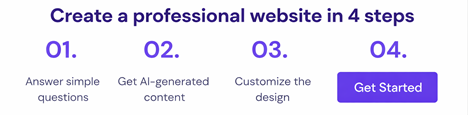
You select “Add Website” and choose the website builder.
You can:
- Pick from over 150 templates
- Use AI tools to generate sections
- Customize fonts, layouts, colors
- Drag-and-drop elements
- Preview for mobile
- Publish instantly
You can realistically go from blank canvas to published site in under an hour.
Option B: WordPress
If you prefer more control and scalability, choose WordPress during setup.
You’ll:
- Create an admin account
- Choose a theme (Astra is commonly pre-installed)
- Install recommended plugins (like analytics tools)
From there, customization happens inside the WordPress dashboard.
This route requires more learning, but offers deeper flexibility.
Step 5: Importing an Existing Website (If You Already Have One)
If you’re migrating from another host, you don’t need to rebuild.
Inside hPanel, you can:
- Use the import website feature
- Upload a website archive into public_html
- Create a new MySQL database
- Import your database via phpMyAdmin
- Update configuration files (like wp-config.php for WordPress)
If your site doesn’t use a database, the process is simpler.
This is more technical, but fully manageable inside hPanel.
Step 6: Testing Before You Go Live
Before announcing your website to the world:
- Type your domain into your browser
- Confirm all pages load correctly
- Test navigation
- Submit contact forms
- Verify SSL (look for the lock icon)
If you changed DNS recently, propagation can take up to 48 hours.
If something doesn’t load properly:
- Double check database credentials
- Confirm files are inside public_html
- Review DNS settings
Hostinger’s live chat support is available if needed.
Step 7: Publishing Your Website
If you used the website builder:
Click “Publish.”
That’s it.
If you used WordPress:
Your site is technically live as soon as installation finishes, unless you enabled maintenance mode.
After publishing:
- Recheck mobile responsiveness
- Check loading speed
- Test from another device
- Share cautiously at first
Where Hostinger Stands Out in This Process
A few things simplify this experience compared to many providers:
- Built-in website builder
- One-click WordPress install
- AI tools for faster setup
- Included SSL certificates
- Automated backups
- Clear upgrade paths
It reduces friction during early-stage setup.
Common Beginner Mistakes to Avoid
- Picking a domain too quickly
- Ignoring domain verification email
- Skipping SSL check
- Publishing without mobile preview
- Choosing WordPress without wanting to learn it
- Overcomplicating the first version of your site
Your first website doesn’t need to be perfect. It needs to be live.
Final Thoughts
Hosting a website in 2026 doesn’t require technical expertise.
The real process is simple:
- Choose a plan
- Claim your domain
- Pick your build method
- Customize
- Test
- Publish
Hostinger makes that flow relatively smooth, especially for beginners.
Once your site is live, the real work begins — improving content, optimizing for search, and refining design over time.
But getting online?
That part is no longer the hard part.